System Administration
EasyCare Tx 2 has a range of administrative controls that allow administrators to manage and customize the titration equipment to meet the needs of the lab environment.
Refer to TxLink 2 Configuration (see TxLink 2 Network configuration) for changing TxLink 2 configuration settings before connecting to a network.
Refer to TxLink 2 Connections (see TxLink 2 connections) for establishing secure connections from EasyCare Tx 2 to TxLink 2 devices.
Refer to Additional TxLink 2 Connections (see Configure EasyCare Tx 2) for establishing secure connections from a second or subsequent EasyCare Tx 2 instance to TxLink 2 devices that already have connections to another PC.
Depending on your network configuration, EasyCare Tx 2 may not automatically find all of your TxLink 2 devices using the Add function. Use the following steps to find a TxLink 2 manually:
Right-click the EasyCare Tx 2 icon and sign in with your Windows administrator username and password, then sign in to EasyCare Tx 2.
On Connection manager, click Administrator then click Add.
Locate Manually add a device with IP address at the bottom of the display and enter the IP address of the TxLink 2 device to be discovered.
When making subsequent secure connections to a TxLink 2 device, the access code is generated from the EasyCare Tx 2 instance that made the first connection to the TxLink 2 device by: clicking on Dashboard, then clicking on the arrow for the TxLink 2, and then clicking Display access code.
If the EasyCare Tx 2 instance that made the first connection to the TxLink 2 device is not known, the access code can be generated by connecting a PC directly to the TxLink 2 via a USB cable and using the following:
Double-click the EasyCare Tx 2 icon and sign in with your Windows username and password.
Click Administrator, USB, and then Settings.
Click Display access code.
You can remove all existing secure connections to a TxLink 2 device, using the following steps:
Note
Use this process if the connection history of the TxLink 2 is not known or the TxLink 2 is to be moved to a different network.
Connect a PC directly to the TxLink 2 via a USB cable.
Double-click the EasyCare Tx 2 icon and sign in with your Windows username and password.
Click Administrator, USB, and then Settings.
Click Reset device security.
Review the Reset security key warning and then click Continue.
Use the Options tab to access all of the EasyCare Tx 2 configuration settings as follows:
Double-click the EasyCare Tx 2 icon and sign in with your Windows username and password.
On Connections manager, select a TxLink 2 that has a PAP device connected and click Connect to open the titration window.
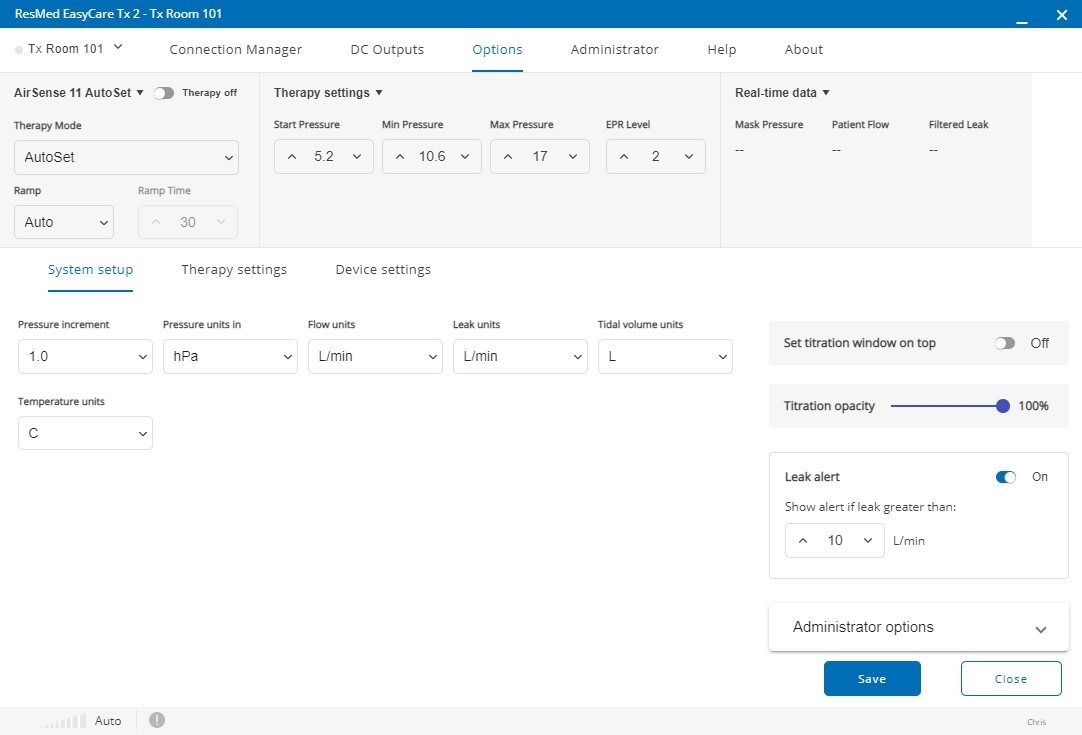
Click Options, and then click the tabs to access System, Therapy and Device configuration settings.
System Setup
Parameter | Description |
|---|---|
Pressure increment | Step size for changing pressure: 0.2 or 1.0 |
Pressure units | Display pressure in hPa or cm H2O |
Flow units | Display flow in L/min or L/sec |
Leak units | Display leak in L/min or L/sec |
Tidal volume units | Display tidal volume in mL or L |
Temperature units | Display temperature in Celsius or Fahrenheit |
Set titration manager on top | Select On to have the titration window always on top of other windows. |
Titration opacity | Set the titration opacity to a value between 50% and 100%. Note100% means windows behind the titration window are not visible. |
Leak alert | Select Off to disable leak alerts. Select On to enable leak alerts. You can set a value for the leak alert threshold. Value can be adjusted in the range 0 to 24 L/min. |
Administrator Options | |
Administrator access | Select On to display the Administrator tab on the titration window. Select Off to hide the Administrator tab on the titration window. NoteIt is recommended to discourage regular users from changing administration settings. |
DC output access | Select On to display the DC output tab on the titration window. Select Off to hide the DC output tab on the titration window. NoteIt is recommended to discourage regular users from changing administration settings. |
 |
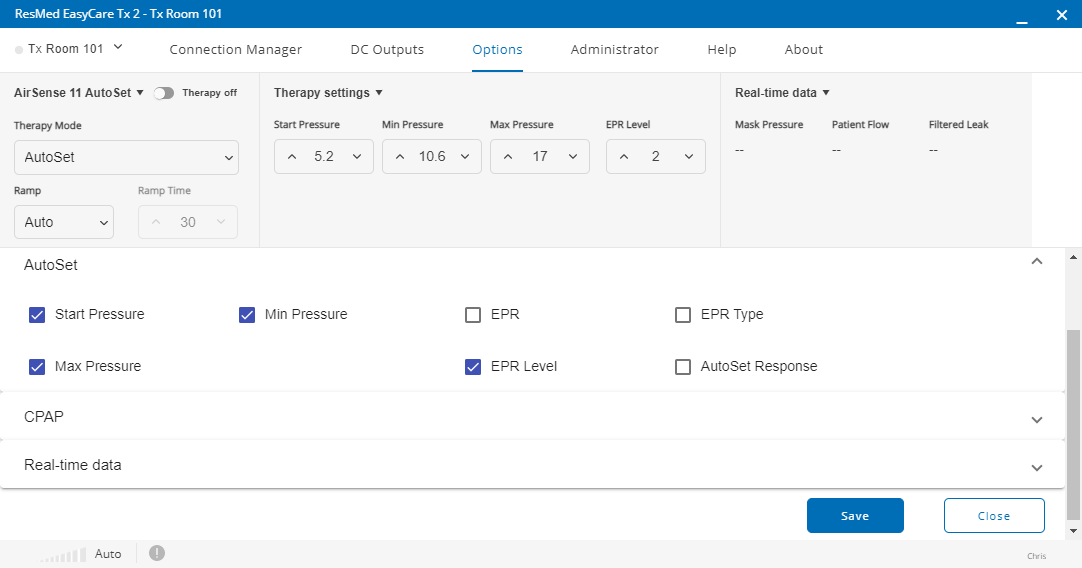
To change the therapy settings and real time data displayed on the titration window for each type of therapy device, click the Therapy settings tab, and then click the drop-down arrow for each therapy device.
You can change the therapy settings displayed on the titration window for the currently connected therapy device by clicking the tick boxes, and change the default settings for other therapy devices that may be connected at a future time.
You can also change the Real time data displayed on the titration window by clicking the tick boxes, for example: Mask Pressure, Patient Flow and Filtered Leak.
Click Save to save any settings changes you have made.
 |
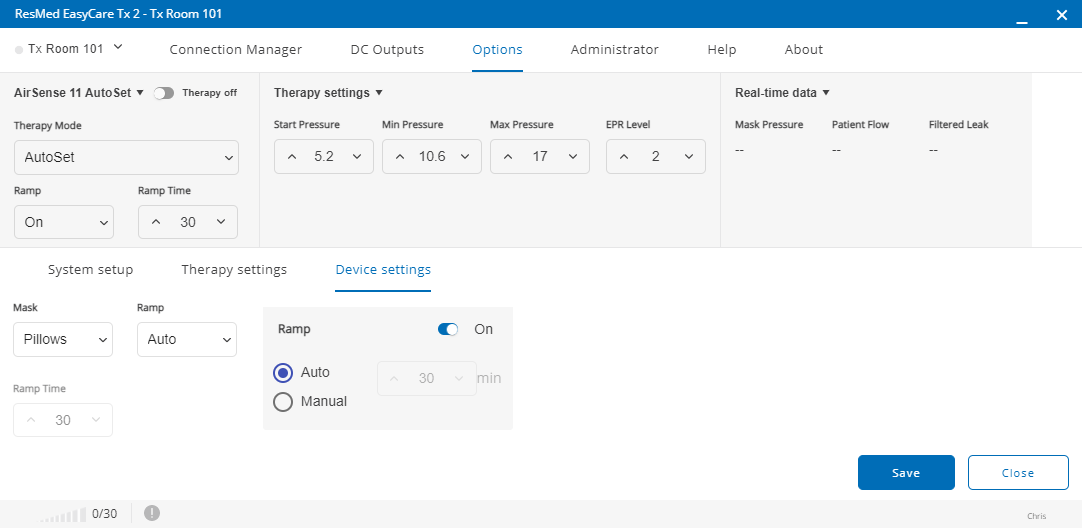
To change the device settings for the currently connected therapy device, click Device settings tab.
You can change settings on the connected therapy, for example: Mask Type, Humidity Level and Tube temperature. You can also set Ramp to Off, On, or Auto.
Click Save to save any settings changes you have made.
 |